“Blessed are those whose strength is in you, who have set their hearts on pilgrimage/journey to Zion.”- Psalm 84:5
Showing posts with label In The Kitchen. Show all posts

Wednesday, February 15, 2012

My Soaked Grain Bread Recipe


Ask and You Shall Receive...that is what happened to me.

God answered my prayers about my health...more than I could have dreamed. I have over the last year and half been on a journey of healing. I have learned that for years my body was highly stressed and toxic. The stress was out of my control and the Lord helped me through it. The toxic part was my doing but I didn't know I was inflicting myself. You might be asking what in the world? Well, I see there is a common issue in many people trying to get healthy again and starting to eat whole grains but they don't understand one very important thing. That is... we need to soak our grains before baking or cooking them. When I cried out to the Lord the second time for more healing he showed me the book " The Maker's Diet" by Jordan Rubin. He introduced to me the some of why and how to soak grains for food. Here is one video that shows how to sprout grains also.

This one cooking skill among others things ( which I will share over the next little while) has changed my state of health dramatically. I have seen my son's and my allergies diminish, my adrenal gland fatigue gone away, clearing up of my skin, no more hypoglycemic reactions. I use to almost faithfully fall asleep reading out loud to the boys after lunch. I couldn't understand why but little did I know I was having a hypoglycemic reaction. I would have to take a 15 minute power nap everyday to be able to function. This always made me nervous if I had to drive somewhere at that time. Now I don't have to worry about that, praise the Lord. I have one friend who is diabetic and was thinking she had to give up grains and I encouraged her to start soaking grains the amazing thing is she had no reaction when eating them. That was HUGE. My mother in law who has avoided grains for years because of the hypoglycemic sugar spike issue. She has come over and ate our soaked grain pancakes and had no reaction. I am dumbfounded at all these personal testimonies. Soaking grains about 100 years or more ago was common but became a almost lost skill. There has been a re-birth of this and one book I cannot recommend enough is Sally Fallon's book Nourishing Traditions... The Cookbook that Challenges Politically Correct Nutrition and Diet Dictocrats. Or you can get a lot of the same recipes and know how's HERE. I will be sharing other sites and recipes that we have found we love over time too, I promise.


But right now I would like to share my favorite bread recipe that I have tweeked and developed from another recipe. It has been a BIG winner where ever I serve it.


Homemade Whole Soaked Grain Bread Recipe


*Makes 4 loaves

*soak together for 8-24 hours, I highly recommend if possible closer to the 24 hours because it gets light and fluffier.
  • 12 cups of ground whole wheat flour
  • 1 cup of acid base....for example kefir, cultured buttermilk, whey, or 1/4 cup apple cider vinegar plus 3/4 ths cup water.
  • 3 cups of warm filtered water
  • 2 cups old fashioned or rolled oats
  • 1 cup of honey ( what I do because my son is highly allergic to honey I fill my measuring cup halfway with sugar and fill the rest with boiled water stir and cool and then add to ingredients)
  • 3/4 ths cup of soft butter ( you can also use melted coconut oil)
  • 1/2 cup flax seeds, optional
  • 2 Tablespoons of poppy seeds, optional
then add ....

  • 1/2 cup water
  • 3 Tablespoons active dry yeast
  • 2 Tablespoons sea salt
  • dough enhancer... a good pinch of powdered ginger, 3 Tablespoons of apple cider vinegar, 8 Tablespoons of vital wheat gluten.

  • Knead the dough for 10 minutes
  • butter very well a big bowl, a bit extra on the bottom because you will flip dough over to coat dough all around.
  • cover ( personally I use my canner lid ) and let it rise for 1 to 1 1/2 hours in warm place.
  • tip... I turn on the over at 350 for 2-3 minutes while I am mixing bread and turn off and turn on oven light.
  • If you have time punch down and let it rise for 45 minutes for a second rising. If not go to the next step.
  • Shape, place dough in buttered bread pans, make 3 slits with a serrated knife 1/4 inch deep, and let dough rise again for 30-45 minutes. I usually re-heat the oven at 150-170*F degrees for a couple of minutes and then turn off before I place the loaves in for the final rising.

  • Leave loaves in and turn on the oven to 350*F and bake for 30-45 minutes. Bread is done when you can insert a cooking thermometer in the bottom of the bread loaf and it reaches 200*F .


  • Remove from bread pans and cool.


From my kitchen to yours...

Tuesday, February 14, 2012

A Day Early Valentine's Day Celebration


Yesterday there was a lot of business going on in the kitchen. I got up and made bread before Handsome, Luke( 2ds) and I had to go to town. And soaking dough for Handsome to make noodles for our day early Valentine's dinner. He and Luke have curling tonight so we decided to celebrate on Monday night. I love it when my man cooks! That is one way he won my heart 22 years ago. He was the only guy who made me dinner and ohhh what good food he can cook too.


He made fettuccine Alfredo with smoked salmon and peas. For desert he made Cherry-o- Cheese pie. What more can a girl ask for??? Ohh and the tulips you see were from him too. Oh, I am so smitten with him still.


Saturday, February 11, 2012

A Sample of My Days


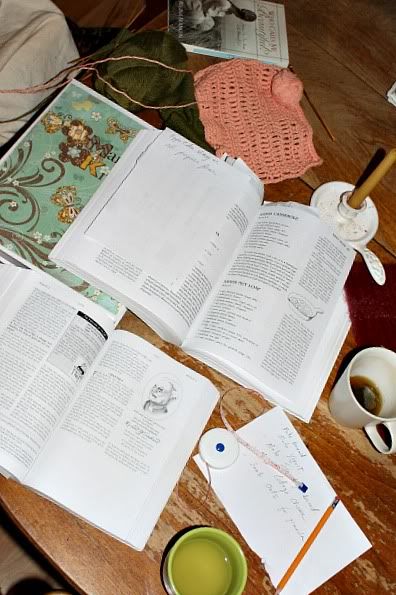
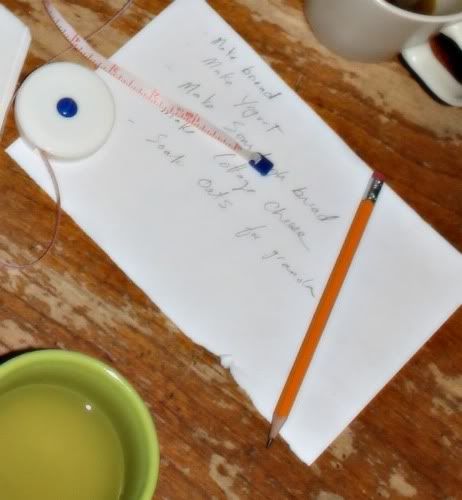
This is a perfect example of how I think. I have so much going on in my head and days. A simple life does not equate sitting and ease. It just means less worrying about what the world thinks and getting back to being hands on in my life. I experience more of what makes my day a day. I cut past the middle person and make things myself and the joy of it all. Now, I am not against a little help. I have my maidservants... the clothes washer , dryer, Kitchen Aide, and food processor. All this has made it so I can stay home and embrace my calling to be a full time wife, mother, homeschool teacher, and fiber artist and for this I am very thankful.


I always am on the hunt to learn learn how to do things myself and cheese making seems to be a fascination right now. I have leaned how to make my own cream cheese, butter milk, Kefir. I am hoping to try to make cottage cheese, mozzarella cheese, ricotta cheese, and cheddar cheese this year. I have found some neat tutorials and will be trying them out real soon. As I learn I am happy to share with you soon what I learned.


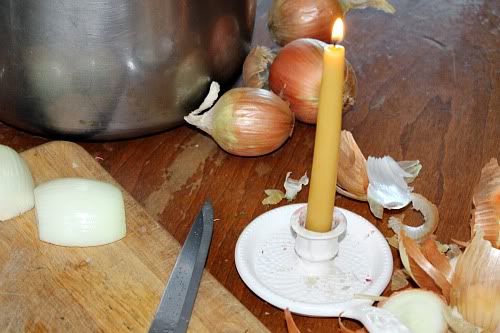
I have FINALLY found a recipe ( and will share SOON) for black turtle bean soup with no tomatoes that tastes very good. typing is a bit much still so I will share over the next few weeks as I can. But I had to share the pictures I have taken while in my kitchen.


Just recently I went through a big doubting period with my bread making. All of a sudden my bread was not fluffy and nice and couldn't get to act right. I doubted myself so much that I started on the hunt for another recipe to get nice round topped bread again. I tried several recipes and I wasn't getting anything better. I went back to my favorite recipe and looked at each ingredient and evaluated it all. The issue of yeast stuck out at me and so I pulled out a new bag of yeast and started over the way I use to make my bread. And you know what? Everything worked out the way it was suppose to. It wasn't me...it was the yeast. What a relief to be able to go back to my favorite recipe that I tweaked and made my own recipe. I will be sharing that recipe first in a few days.

But I did learn something new this time around. It is better to just let it soak for 24 hours instead of 8-12. That soaking time makes is soooooooo nice and fluffy.


Another good thing that came from my bread searching time was dabbling once again in making sourdough bread. I am going through another learning curve and developing my hand at making this amazing bread. All in good time to master the art of sourdough.

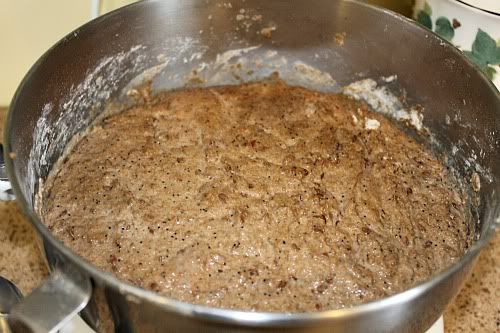
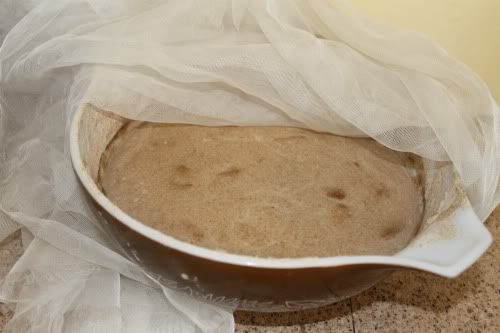
( homemade sourdough starter from rye flour )


I don't know if you see this picture of cream cheese ( and whey) making on it's side our right side up. Photobucket is not cooperating with me today. ((sigh)) I hope you see it right side up. [o=


There really is lots of passive cooking going on in my kitchen lately. All these things that are soaked, fermented, or sprouted. As my hubby says there are a lot of science experiments going on in there. [o;


One last thing to share with you all. This is the view that is to the northeast and we get to see from our living room window. I love watching the sunrises over these mountains. God's creation is so amazing.

I lift my eyes up to the mountains and I know where my strength comes from.


Wednesday, January 11, 2012

52 Weeks Organized House Challenge ~ Kitchen Counter Update


It took me a while to update my Kitchen Counter challenge, sorry. I kept working hard to get it all nice and spic and span but I had to keep making food while doing it. I started to feel discouraged but I pressed on. On Sunday night hubby and I went out to his ( belated ) staff yearly appreciation dinner. There was A LOT of staff sick in December so it was postponed till January. We got to stay the night at the hotel (at his work) too and had a get away night. I had forgotten that Monday was my Crisis Preg. Center board meeting and shift. That meant I didn't come home till 6:30 on Monday night. I got back to working on it Tuesday and part of Wednesday among-st lessons and other chores but I finally did it. And the pictures are proof. [o= As I was going through my stuff on the counters I kept asking myself do I really need this in the kitchen? Do I really need this? Could I do without this? Does it fit my goals for the kitchen? Does it help me or hinder me? I was able to get rid of some things and re arranged some things. Some things went down to the pantry. I was very pleased with my results.

This coming week the challenge is....


(click on picture to go to challenge)

Week #2 Organized Home Challenge
Kitchen Drawers & Kitchen Cabinet Organization


This week's challenge is all about kitchen drawer and kitchen cabinet organization, where you will both declutter and organize things in a way where you can easily access what you need, when and where you need it.

Thank you for all your sweet encouragement. It sure helped me when I felt like giving up.

Friday, November 11, 2011

Crunch Time Getting Ready For the Craft Fair


My days for the last week or two ( after getting home from my sweetie's and my romantic get-away) has been very full. I have been washing and filling juice jars with raspberry-rhubarb or plain rhubarb juice plus crafting. I will be selling the juice, my beeswax gourd candles, hand dipped tapers, hand dipped and twisted tapers, knitted baby booties, along with my milk chocolate or mint chocolate fudge. This Friday and Saturday I will be busy selling my wares and in hopes to save enough money to get a new camera plus some needed items for the family and home. ( So if you wondered where I am and what I am doing...now you know. [o= )


Wednesday, October 12, 2011

Pumpkin Goodness


My all time favorite squash is pumpkin...to grow or to make into something good to eat. Just recently I found two VERY good recipes I have to draw your attention too. They are Simple Pumpkin Muffins at Lisa's and Pumpkin Scones over at Debbie's. Now you would think the day after I hosted Thanksgiving dinner that the only thing I would have done is found a comfy chair and did nothing but knit all day. But...I didn't. I had some left over pumpkin puree and I knew what I wanted to make. I have been drooling over these recipes and had to make them. They both were huge hits in my home! Today I still have a bit more puree so I will be making more of these goodies and freezing them for another day. :bake

Friday, September 30, 2011

Crab Apple ( or Apple) Jelly Recipe


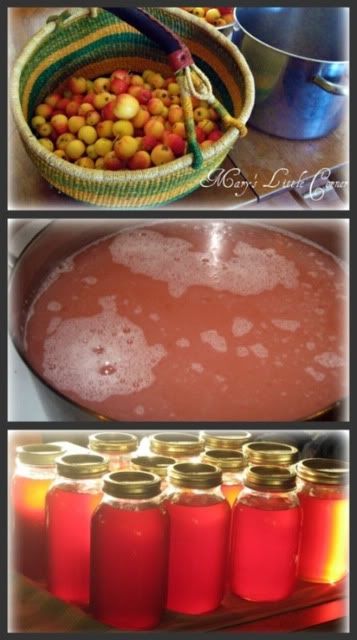
This is apple time and one of our traditions is to go picking and make crab apple jelly each year. My ds Luke and I are allergic to pectin so this is a perfect jelly for us. It is so scrumptious and I have to say it is beautiful too. I love how it seems to glow and glimmer in the sunshine. [o= If you don't have a source of crab apples then you can use this same recipe and make Granny Smith Apple Jelly but it won't be the same red colour. So here is the recipe!


CRAB APPLE ( or Apple) JELLY RECIPE

Fill a large pot with ripe cut in half crab apples or cut in quarters Granny Smith apples that had stems and ends removed. (peels and cores need to be included for jelly to work)
Cover with water so it just covers apples & bring to boil on medium high heat.
Simmer for 50 minutes until mushy-soft.

Place cooked crabapples & liquid in strainer (lined with cheesecloth)

over large bowl until juice is strained. Later I gather the cheese cloth and tie a string around to close then lift and hang it above a bowl or pot to get every last drop of juice. ( I will show a picture later today or tomorrow to demonstrate this)
Measure juice = __ c. (Make note of this quantity for later.)

Sterilize canning jars , 10 minutes in boiling water.

Combine prepared juice in large pot. Add equal amounts of sugar to juice. Stir on med-high heat until it comes to a full rolling boil. Boil hard for 40 minutes, stirring once or twice, testing for jelly stage near the end. Skim off foam if necessary.

Pour into hot sterilized jars to within 1/4 inch of top. Wipe rims clean for a tight seal. Put on lids and screw tops "finger tight". Allow to sit overnight on a tea towel on counter to seal.


Joining my sweet friend Lori in...

Plans4You


Thursday, September 22, 2011

My New Kitchen Helper


It is that time of year again and we are starting the apple harvest. The first apples to be harvested on our homestead is the Transparent apple. It is a family tradition of picking the these apples and making apple sauce ( go here if you want to know how to ) out of them.

Yellow Transparent Apple


But this year I have a new helper. Ohhh what a good helper this little guy is. I have been making apple sauce for many a year and this has to be the easiest year yet because of my Kitchen Aide saucer attachment. Every year after my craft sales we invest in something to make homemaking easier or something for my crafts. Last year we invested in the saucing attachment and it was worth every penny. I have struggled with tendinitis for years and cranking apple sauce through a food mill has been hard for me. But with this I can sauce tons and it won't hurt my wrist a bit. Thank you Lord.


Whats next on the agenda? Crab apple jelly.

Thursday, September 15, 2011

Recipes for Garlic Syrup and its Benefits


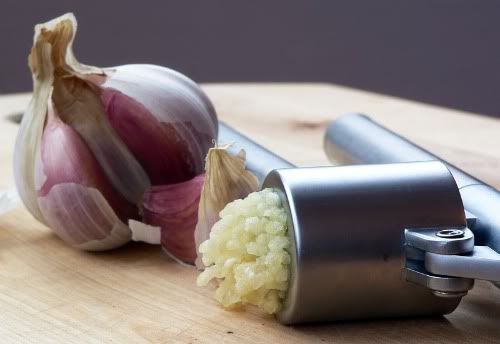
I am DIY kind of gal and had to start doing some research for a recipe to make my own garlic syrup...among-st all the other things going on. I tend to do this when I get overwhelmed and have to flake out for a few minutes,lol. [o= And here is what I found!


Benefits of Garlic Syrup
  • This remedy is an immune stimulant
  • lowers blood pressure as well as cholesterol
  • leads to fewer colds and infections
  • helpful in conditions such as gout
  • arthritis, and joint aches.
  • It is also a good tonic for the digestive tract
  • and benefits the skin
  • and is helpful in weight loss.
  • It is beneficial for a wide range of conditions as it is a general immune stimulant and enhancer.


Garlic Syrup Recipe #1

4 bulbs garlic (approximately 50 cloves)
1 quart apple cider vinegar

Directions:

  • Peel and chop garlic. Place in a sterilized quart jar, cover with vinegar.
  • Refrigerate.
  • Shake jar daily.
  • Take 1 tablespoon up to 3 times a day (adult). Sweeten as you like if needed.


Garlic Syrup Recipe #2

3 bulbs garlic (peeled)
2 cups water
1 cup cider vinegar
1/4 cup honey

Directions:

  • Add garlic and water to a non-aluminum saucepan and simmer until the water reduces to 1 cup (garlic should now be soft).
  • Remove garlic and place in a sterile jar or airtight container.
  • Add both the honey and the cider vinegar to the water in the saucepan and boil until syrupy. Pour over garlic, seal and refrigerate overnight.
  • Refrigerate and take up to one teaspoon daily.

I will be trying these out next week and if you try it out let me know how it went. [o=


Craft Fair Update:

  • The beeswax gourd candles are made and boxed
  • fudge is made, cut and wrapped
  • and now I am cleaning jars and prepping to make the rhubarb juice and raspberry rhubarb juice. ( and believe it or not having to blanch and freeze veggies and can apple sauce that are demanding to be harvest too, lol)


Joining my friend Lori in...

Wednesday, August 31, 2011

One Of My Experiments~ Dried Beans


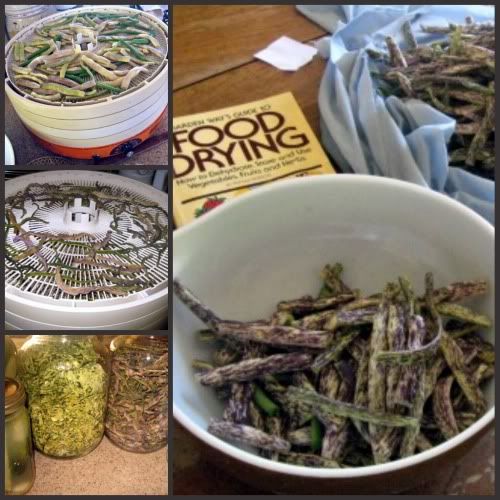
This year I am trying real hard to find ways to preserve food with as little use of plastic as I can. So instead of blanching and freezing beans in freezer bags I am trying out drying my beans. After drying them I store them in glass jars.

How I did it...

I picked the beans when they were still immature ( meaning it hasn't started to form bean seeds) and then blanched them for 2 minutes in boiling water. Dried in the dehydrator for 8-14 ( or until dried) hours at 120*F.

*How to use them...

You can throw them into soups or stews or re dehydrate them and use them in other recipes.

*Here is one recipe...

Dried Green Bean Dish

2 cups boiling water
3/4 ths cup dried green beans
2 Tablespoons dried onions, minced
4 slices of turkey bacon, diced
1/2 teaspoon salt


Pour boiling water over green beans and onions in saucepan. Cover and cook over low heat for 45 minutes until plump and tender.

Meanwhile saute' turkey bacon in a small skillet until brown. Add bacon to green beans. Mix lightly and serve.

serves 4 to 6

Friday, August 26, 2011

Drying Zucchini and Recipes


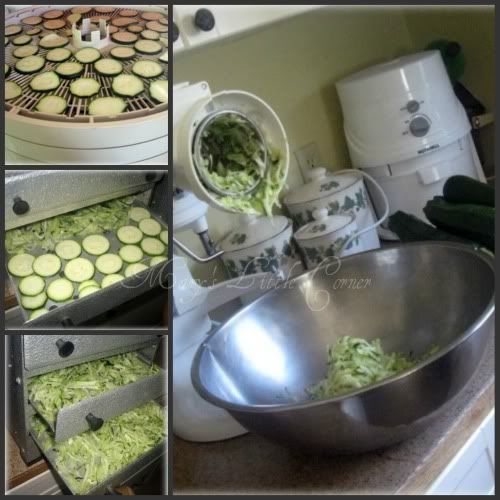
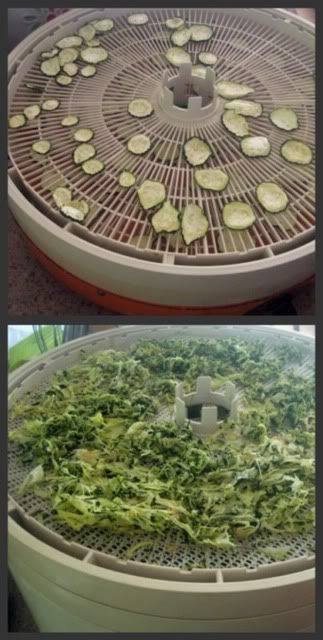
August and September has now been officially titled my MOST busy months of the year. ( it seems to be a pattern now for the last 5 yrs) I am trying to bring in the harvest of zucchini, green beans,greens and hubby is buying peaches to process( along with craft making and getting ready to start school). I have been praying and trying to find plastic free ways to preserve food. One thing that I felt lead to is go back to a very old way and try to dry some of the produce but with a modern twist of a dehydrator. This year I am drying shredded zucchini and sliced zucchini. I will be making some chocolate zucchini bread and a sliced zucchini casserole this winter.


How I did it..


Shredded Zucchini

I shredded the zucchini and then dehydrated it at 125 degrees for about 5-6 hours. Let it cool and store in glass containers till you need it.

Here is a recipe I found HERE.


"zucchini-rhubarb bread".
***************************************

Ingredients:

3/4 of a cup of dehydrated shredded zucchini
1/2 of a cup of dried rhubarb
1 1/4 cups of warm water
3 teaspoons of dried egg powder or 3 fresh eggs
1 cup of melted butter
2 cups of sugar
1 teaspoon of vanilla extract
1/2 teaspoon of ground cinnamon
1/4 teaspoon of ground cloves
1/4 teaspoon of ground ginger
2 1/2 cups of white flour
1 teaspoon each of baking powder and baking soda
A pinch of salt

Before starting your bread pre-heat your oven to a temperature of 325 degrees. While waiting for the oven to obtain its temperature grease two small 3 by 7 inch bread pans.

In a medium size bowl combine your dehydrated zucchini, the rhubarb and warm water together and hand mix well. Let this mixture sit for approximately 30 minutes.

In another medium bowl beat the eggs well and add the butter, the two cups of sugar, and the vanilla extract. Once again mix well by hand-stirring. It is now time to add the rehydrated zucchini and rhubarb along with some cinnamon, cloves and ginger. Stir the mixture again to combine all the ingredients.

In yet another bowl you will be combining the white flour, baking powder and soda while adding the pinch of salt. After mixing the dry ingredients together you can add it to the egg mixture and continue to blend together by hand. Now divide the batter you have created into the two bread pans. Let the pans rest for about 20 minutes prior to baking in order to allow the flavors to mingle properly.

Bake your bread for one hour and then check it by placing a toothpick into it. If the toothpick comes out clean the bread it done. Remove them from the oven and cool on a wire rack.

There you have it all in a nutshell, an excellent method of preserving your zucchini from your summer garden for homemade wintertime bread.

Dehydrating Zucchini and Making Bread
By Joseph Parish


I will be experimenting with converting my chocolate zucchini bread and will share when I get it all ironed out. [o=

Also here is a recipe for sliced zucchini.


Zucchini Chips
*************

Dry sliced zucchini at 120 degrees for 12-18 hours

Eat as a snack alone or dip into favorite dip or use in ...


Italian Zucchini Casserole
***************************
serves 4

2 cups boiling water
2 cups dried zucchini
1 medium onion thinly sliced
2 Tablespoons butter
1 cup fresh or canned tomato ( I will be using fresh or roasted sweet peppers)
Salt and pepper
1/2 cup cheese

Pour boiling water over dried zucchini slices. Let Soak 1 to 2 hours. Drain. Cook onion slices in butter or margarine until transparent. Add drained zucchini slices. Cook and stir 5 minutes. Add tomatoes or sweet peppers and season to taste with salt and pepper. Pour into casserole and top with grated cheese.
Bake in 350*F oven 25 to 30 minutes, until lightly browned.


Having tons of fun in the Kitchen. [o=

Joining my friend Lori in...


Tuesday, August 23, 2011

Wedding Cupcakes and Some Family Pictures Pt.2


I am hoping to post one more slide show after I get some more pictures from my DIL Essie. Till then here is a peek into our week end. [o= Family has gone home and we re cooperating today. :nap

Friday, August 19, 2011

Baking Wedding Cup Cakes Pt. 1

Interrupting this blogging break for a fun slide show. [o= My Sister, 4ds Nicolas, niece Mariah, and I made chocolate cupcakes, carrot cake cupcakes, lemon cupcakes, and banana walnut cupcakes. Tomorrow my DIL, sister, and I will be icing them. Pt. 2 to come!

Tuesday, August 16, 2011

Tightwad Tuesday...Making Sprouted Wheat Flour ( and Healthy Wholewheat Pancakes Pt. 2)


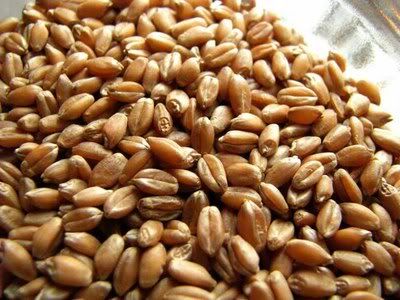
If you have been visiting lately you would know that I am on the hunt for incorporating soaked, fermented, and sprouted recipes lately. I finally jumped in and sprouted my own wheat berries and made sprouted wheat flour. If you were to go to the health food store you would pay a lot to buy already sprouted wheat berries. And this is where the savings tip comes in. I found some neat videos to show how to sprout your own wheat for a fraction of the price.


I saw some techniques lately that were a bit more complicated and then I found these videos. Oh they are so easy to implement. I sprouted some of my own wheat berries, dehydrated them in my dehydrator, ground them in my wheat grinder and made some pancakes. ( Part 1 of making healthy pancakes is HERE) They were wonderful! I used the flax seed egg replacement and had the most fluffy and light wholewheat pancakes I had ever had . I also used 1/2 the amount melted butter ( or olive oil) and 1/2 applesauce to replace what it called for oil in the recipe. With all these alterations not only do you have VERY healthy pancakes you have done many ways to decrease what you would have had to pay to make them.


Here is how to make flax seed egg replacement


Oh btw here is my pancake recipe that I use...


Mary's Pancakes ( Non soaked)

2 serving of flax seed egg replacement ...1 Tbsp. ground flax seed to 2-3 Tbsp.s water
2 cup of ground sprouted wholewheat flour
2 tsp. sugar
2 Tbsp baking powder
2 Tbsp.s melted butter or olive oil
2 Tbsp.s applesauce
1-2 two cups milk to desired consistancy ( I personally put in 1/4th the amount of milk and 3/4ths the amount water)

Beat eggs with a fork or whisk till light and fluffy: beat in remaining ingredients just until smooth.

If you try them come back and let me know how they turned out. :bake


I am joining today...


and

Plans4You

and...


Growing Home

Related Posts Plugin for WordPress, Blogger...