“Blessed are those whose strength is in you, who have set their hearts on pilgrimage/journey to Zion.”- Psalm 84:5

Saturday, June 11, 2011

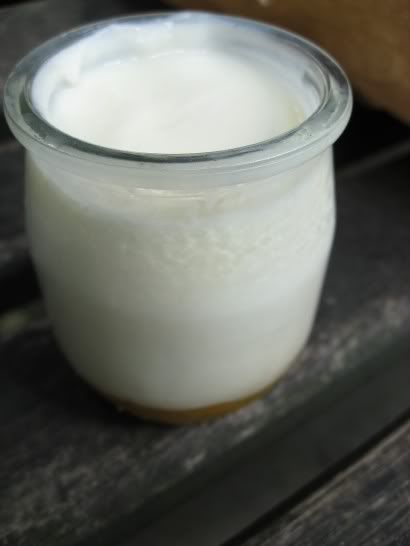
A Journey To Better Health~ Making Yogurt Again ( And A Tutorial )


I am returning again to making yogurt. I love, love, love yogurt and I am really coming to understand how good it is for you and why.

" You shall have enough goats milk for your food, for the food of your household, and the nourishment of your maidservents" Proverbs 27:27

In Bible times people consumed un pasteurized or un homogenized milk strait from the goats or cows but not today unless you own your own animals. And because they didn't have refrigeration back then they either used it right away, fermented it, or made it into cheeses...which is yogurt and other such products. These live foods provide such excellent benefits compared to what we have today. The milk we get today in the general stores are less nutritious ( because of what they feed the cows and the antibiotics which can potentially be harmful and aide to the cause of allergies and even heart disease.

Health benefits of high-quality fermented dairy:

-provides calcium that builds bones in children
-lowers high blood pressure and cholesterol
-attacks bacterial infections ( especially those causing diarrhea
-prevents dental cavities
-prevents chronic bronchitis
-stops the growth of some cancers, including colon cancer
-boosts mental alertness
-boosts energy

Both high quality fermented goat or cows milk are so good for you but goat milk is easier for your body to break down.

Some benefits to goat milk are...

-is less allergic ( because it doesn't contain the complex proteins that stimulate a allergic reaction)

-doesn't suppress the immune system

-much easier for your body to digest and break down

-has more buffering

capacity than over the counter antacids

-alkalinizes the digestive system because it helps to increase the pH of the blood stream.

-doesn't produce mucus

-is a rich source of trace selenium


How To Master The Art of Yogurt Making


***I suggest if you don't have access to un pasteurized milk then goat milk is the next best thing to use.


I want to share the method that helped me finally master the art of yogurt making. I have tried different ways and had always had runny yogurt. I was about to give up and then I found a way I

could master the art of yogurt making.


First warm your oven to about 350* for 4 minuets and then turn off oven and leave on the oven light.


While I do this I heat up my half gallon of milk on medium heat on the stove to 180* degrees. ( it took me about 30 minutes ) I monitor this with my candy thermometer.


I turn off the burner and set the pan on the table on a hot pad to cool near me where I knit. I let it cool down to about 115* to 120*.


I take out one cup of the warm milk and wisk 8 Tablespoons of yogurt with active bacteria ( my starter). ***Important... make sure the yogurt is room temp.***


I then pour it back into the pan and wisk it a bit more.


After you have mixed it then pour into clean quart jars and place on a cookie sheet in the warm oven. Leave the oven light on and let the yogurt

set between 4-8 hours till thickened. If you let it go beyond 8 hours it will be more sour.


I calculated by making your own yogurt you can spend 1/4

the cost of what it would cost you in the store.


To Make It Even More Tightwad’ish…

.

One way to make this even more of tightwad’ish tip is to take your store bought yogurt (…your starter) and pour and freeze in ice cube trays. After frozen transfer future yogurt cubes into a zip-lock bag and place in freezer till you need them. four ice cubes equals 8 Tablespoons. When you need your starter defrost 4 ice cubes and bring them to room temperature and use.

. You can also piggyback starters by using some of the yogurt from your batches of yogurt up to 3 or 4 times (piggy backing). And then you need to defrost another 4 yogurt ice cubes to start over again. If you try to piggy back over 4 times you are more than likely get tarter yogurt. This makes it so it is just pennies in your cost of yogurt

starter.


Extra Hints

…if your starter is tart you will probably get tart yogurt.

.

Only make enough yogurt that you will use up in 5 days and then make another batch.

.

I found if I wanted a thicker yogurt I used 2 % or whole milk. Or after you make your yogurtwith 1% milk or skim you can strain on a coffee filter or cloth like a pillow case in a colander to make a more Greek style yogurt

. ( save whey to use in bread or soup ).


PS: I found this neat fact( from here)...


Flu Fighter #2: Yogurt

Yogurt contains probiotics — good bacteria that line our intestines and defend our body against invading germs. Buy plain yogurt to get fewer calories and less added sugar than you do from fruit-flavored versions, and add your own sweetness with a teaspoon of honey (which may also be an immune booster, because it feeds good bacteria in our gut). To make sure your yogurt contains probiotics, look on the container for the National Yogurt Association's "Live and Active Cultures" seal, which means there are at least two types of healthy bacteria and 100 million bacteria per gram.


Friday, June 10, 2011

A Journey To Better Health ~ Beginning The Journey

I am on a journey to better health lately. I am hoping to blog at least once a week ( or possibly more) on what I am learning and doing to get healthier. To give you a bit of history of me, when I was 19 ( many moons ago) I became a certified Fitness Specialist Instructor. Now after leaving that field, married for just over 20 years and 4 sons later I'm trying to get back to where I need to be. I have gained and need to loose 30 lbs. No, this is not my pre-baby weight but it is a healthy weight for me.

Here is a video of pictures of me and my family over the years. I had originally made it as a anniversary gift to my Handsome.


Here is a picture of me a couple of weeks ago.


Wednesday, June 8, 2011

She Wears A Skirt- A Week In Skirts Pt. 1


A very recent picture of me at the Lady's church retreat this last week end. I am bent over because we were taking a group picture.


I have been really enjoying The Modest Mom blog for a bit now. She is hosting "She Wears A Skirt" series and this week she asked any gals to join in on "A Week In Skirts Link Up". Well this week went by fast and I didn't get pictures taken like I had hoped. So I am showing past pics of me living life in a skirt. And I hope later this week to get updated pics of me living in skirts now. [o=

I have been wearing skirts for just over 6 years. God moved my heart to dress more modestly in skirts because the sweet quiet spirit of Jackie Wellwood (in her books). I didn't have anyone around me modeling this life choice and it has been a journey of learning. Some skirts I wore in the beginning I now don't feel comfortable in. I am now finding my own personal style and I am trying to learn to sew my own skirts .


This is me gardening in the skirt that I did a tutorial on how to "modest'ize a slit skirt" . I almost didn't post this one but it does really show real life in a skirt. Yes, I am giving my son instructions on doing something in the garden, lol.


This was a few years ago harvesting the winter squash out of our garden.


And here I am on a family trip in the Greater Seattle area visiting my family. ( my sister is next to me, then my mom, and my oldest ds Philip. Noah is in the red t-shirt.) We went to the Seattle boat locks.


Here I am doing archery. I have to admit I wear looser skirts now but this still shows how you can do almost anything in a skirt.


I had this picture taken to show and tell my Shalom Cardigan that I knitted but you can have skirts match things just like you would jeans. It all works so nice.

I hope you come back and see Part 2. of me in "A Week In Skirts."

Wednesday, June 1, 2011

Swiss Chard, Shallots, Bean Poles and Snow Oh My!


Sunday's and Mondays are Handsome's week-end and that means on Monday's it is our day to get as much as we can done kind of day. We are working full force to get the garden in and make a few extra raised beds. My BIL came up with a great idea for heavy duty bean poles. We had done some logging on our homestead to clear for the water system and also for a fire break. With all these logs we are trying to process them as much and soon as we can. I loved seeing the boys work along side us in the garden


Here is Handsome planting swiss chard seeds....


shallots. And here is the fresh snow just up the mountains.


Thursday, May 26, 2011

Getting Ready To Plant

It is that crazy, busy , not enough hours in the day kind of time. Things are growing (even the weeds...sigh) and we are moving as fast as we can to prep the ground to plant. In a lot of ways we feel so behind. But we keep putting one foot in front of the other as fast as we can. We hope to be planting in a few days. As my Handsome works so hard to weed I am re-potting the hot and sweet pepper plants on the plant table.


Here is our Lavage plant. You only need one of these per family. In the early spring we can use it in our food like celery. Later you can dehydrate the leaves to flavor stews. Go HERE to learn all about this plant.

Our apple and pear trees are in bloom. They are such a treat to see.


I had a lot of fun taking pictures of Handsome while he was making the 3 extra plant beds for this year. We are hoping to increase our green bean crop for the 3 house holds. ( MIL's, BIL's, and our households ) We are hoping to get enough to eat fresh and freeze for the winter.


While Handsome and the boys were reclaiming and building the area for the plant beds I was weeding and thinning the Asian green beds.


Fruits of my labor....greens for dinner.


Related Posts Plugin for WordPress, Blogger...