-is less allergic ( because it doesn't contain the complex proteins that stimulate a allergic reaction)
-doesn't suppress the immune system
-much easier for your body to digest and break down
-has more buffering
capacity than over the counter antacids
-alkalinizes the digestive system because it helps to increase the pH of the blood stream.
-doesn't produce mucus
-is a rich source of trace selenium
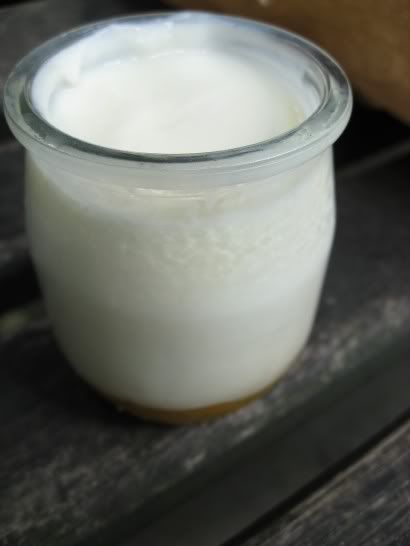
How To Master The Art of Yogurt Making
***I suggest if you don't have access to un pasteurized milk then goat milk is the next best thing to use.
I want to share the method that helped me finally master the art of yogurt making. I have tried different ways and had always had runny yogurt. I was about to give up and then I found a way I
could master the art of yogurt making.
First warm your oven to about 350* for 4 minuets and then turn off oven and leave on the oven light.
While I do this I heat up my half gallon of milk on medium heat on the stove to 180* degrees. ( it took me about 30 minutes ) I monitor this with my candy thermometer.
I turn off the burner and set the pan on the table on a hot pad to cool near me where I knit. I let it cool down to about 115* to 120*.
I take out one cup of the warm milk and wisk 8 Tablespoons of yogurt with active bacteria ( my starter). ***Important... make sure the yogurt is room temp.***
I then pour it back into the pan and wisk it a bit more.
After you have mixed it then pour into clean quart jars and place on a cookie sheet in the warm oven. Leave the oven light on and let the yogurt
set between 4-8 hours till thickened. If you let it go beyond 8 hours it will be more sour.
I calculated by making your own yogurt you can spend 1/4
the cost of what it would cost you in the store.
To Make It Even More Tightwad’ish…
.
One way to make this even more of tightwad’ish tip is to take your store bought yogurt (…your starter) and pour and freeze in ice cube trays. After frozen transfer future yogurt cubes into a zip-lock bag and place in freezer till you need them. four ice cubes equals 8 Tablespoons. When you need your starter defrost 4 ice cubes and bring them to room temperature and use.
. You can also piggyback starters by using some of the yogurt from your batches of yogurt up to 3 or 4 times (piggy backing). And then you need to defrost another 4 yogurt ice cubes to start over again. If you try to piggy back over 4 times you are more than likely get tarter yogurt. This makes it so it is just pennies in your cost of yogurt
starter.
Extra Hints
…if your starter is tart you will probably get tart yogurt.
.
Only make enough yogurt that you will use up in 5 days and then make another batch.
.
I found if I wanted a thicker yogurt I used 2 % or whole milk. Or after you make your yogurtwith 1% milk or skim you can strain on a coffee filter or cloth like a pillow case in a colander to make a more Greek style yogurt
. ( save whey to use in bread or soup ).
PS: I found this neat fact( from here)...
Flu Fighter #2: Yogurt
Yogurt contains probiotics — good bacteria that line our intestines and defend our body against invading germs. Buy plain yogurt to get fewer calories and less added sugar than you do from fruit-flavored versions, and add your own sweetness with a teaspoon of honey (which may also be an immune booster, because it feeds good bacteria in our gut). To make sure your yogurt contains probiotics, look on the container for the National Yogurt Association's "Live and Active Cultures" seal, which means there are at least two types of healthy bacteria and 100 million bacteria per gram.

Awesome dear friend! This is what I will be making next week. :-D
ReplyDeleteThanks for sharing...when I get settled I will be back to learn and try this recipe...all the plans I had for learning this summer are on hold right now.
ReplyDeleteI may try this! Sounds great! Thanks, Mary!
ReplyDeleteOur local farmers market has fresh raw milk which I use when I do milk, which is very sparingly. I do get the yogurt pretty much on a weekly basis and it is so good. It's nice and sweet and I don't even need to add anything to it. There is nothing as good as home made yoghourt. I may try it on my own one day so thanks for the tips.
ReplyDeleteGreat information! I used to make yogurt and just haven't for a while now.
ReplyDeleteMary,
ReplyDeleteDo you use regular canning lids? If they seal is that okay?
Thanks,
keri
Keri,
ReplyDeleteI don't think it matters if it seals. I use glass lids till it is done incubating and then I use plastic canning jar lids after.
Hope that helps. [o=
Blessings<><
-Mary
Thanks Mary! I'll let you know how it goes!
ReplyDeleteHave a great day!
It was wonderful to have a visit from you today!
ReplyDeleteWhat lovely blog you have here, Mary! I just joined through GFC!
Have a blessed week!
Great tutorial!!! I need to do this again! I love love love homemade over store bought and you are right it cost so much less. I think it taste better too. I suggest using a organic milk for the starter. It is pricy but so much better for you and without antibiotics and growth horomones. I use jelly jars for mine ( when I was making it). Perfect size for a serving and stores easily in the fridg.
ReplyDeleteIt's been a bit of time, but I'm having my daughter make some yogurt this afternoon. Don't know if I ever mentioned it, but I did make this and it turned out perfectly! Thanks again for this recipe....
ReplyDeleteMy blog reading has diminished a bit...hope to get caught up with al you are doing!
Have a great day, Mary!
Hello Mary,
ReplyDeleteI am COMPLETELY behind in blogland, but was making your yogurt today and wanted to stop by and say hello! Hope all is going well and that you are having a lovely summer!